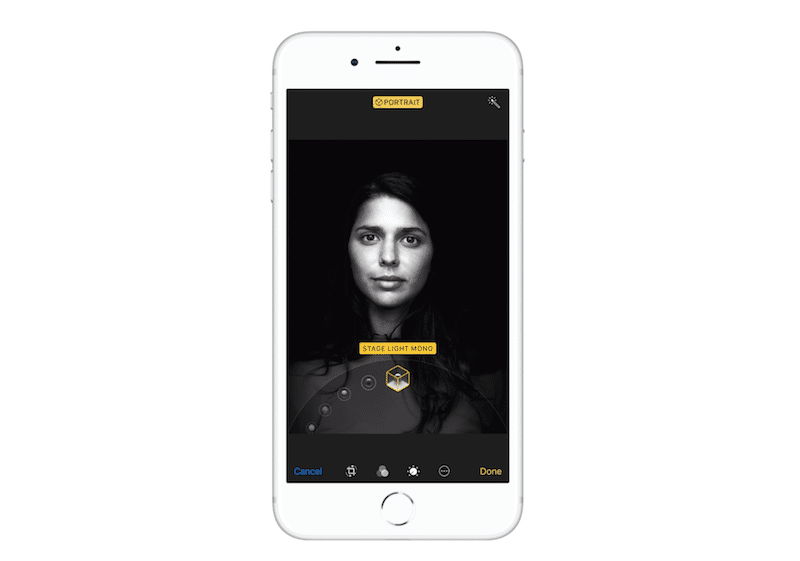
One of the biggest features in iPhone 7 Plus was the Portrait mode. Using the dual camera setup, you could create awesome depth effect photos right from your iPhone. It brought professional level depth photography to the masses. iPhone 8 Plus does the same for portrait lighting.
The new feature in iPhone 8 Plus brings professional level lighting effects to your iPhone. Portrait photographers usually use complex lighting equipment to light up your face in a certain way. They use the lighting to get the photo effect they want. Portrait Lighting feature lets you do the same without an expensive camera setup.
The Portrait Lighting Effects
The best thing about this new feature is that it’s not disruptive. While it’s in beta, it’s possible that you’ll run into weird issues. But it’s easy to revert back to the original photo after the fact.
And you can add Portrait Lighting effect later on as well.
Right now, there are 5 different types of lighting effects.
Natural Light: This default Portrait Mode effect keeps the person’s face in focus and blurs the background.

Studio Light: This is probably the best effect and the one you’ll end up using often. This effect brings out more detail in the person’s face. It’s also more brightly lit.

Contour Light: Now things start to get dramatic. This effect will add a shadow to the face and the surroundings.

Stage Light: The background will be pitch black and the subject will still be in color (although the colours will be a bit muted).

Stage Light Mono: If you want a black and white portrait that only shows the face, and turns everything else dark, this is the effect for you.

How to Choose Portrait Lighting Effects From Camera App
You can use Portrait Lighting feature from the Camera app, while you’re taking photos. You’ll see a live preview of the effect.
Step 1: Launch the Camera app
Step 2: Swipe to select the Portrait Mode.
Step 3: Tap on Natural Light to get the slider that lets you swipe through the effects.
Step 3: Move through the effects like a carousel. As you switch between the effects, you’ll see that the preview on top changes as well.
Step 4: When you like what you see, just hit the shutter button.
How to Add or Edit Portrait Lighting Effects Later

When you’re shooting, you might not want to spend time deciding the best lighting for the subject. You don’t have to. Just make sure you’re shooting using Portrait Mode.
Step 1: Open the Photos app and find the Portrait mode shot you want to edit.
Step 2: From the photo, tap on Edit.
Step 3: You’ll see the familiar Portrait Lighting carousel in the bottom. Scroll to see all the effects. Tap on an effect to add it.
Step 4: If you want to go back to the default effect, just go back to Natural Lighting effect.
Step 5: Tap on Done to save the photo.
We were able to take some great photos with the new Portrait Lightning feature in Portrait mode. It seems like a cool feature. But we think it still needs some work as the edges of the hair and the body seemed to merge with the background especially in Stage Light mode making the photos look a little weird. But like the Portrait mode last year, Portrait Lighting is also in beta currently, so we expect it to get better.
What Do You Think of the New iPhone 8 Plus Camera?
What kind of shots have you captured with the new iPhone 8 Plus camera? Share with us in the comments below.