Yes, we have 5.5 inch iPhones now. But huge screens don’t translate to blown up content. It’s possible that iPhone’s default settings for text and UI elements are just a tad small or difficult to read. It’s a natural thing. With age, the eyes start deteriorating. Hell, I’m 24, I have glasses and I still find the text a bit too small by default.
If you’re having trouble reading or viewing text or elements on the iPhone screen, use the tips below to make things easier on the eyes.
1. Increase Text Size

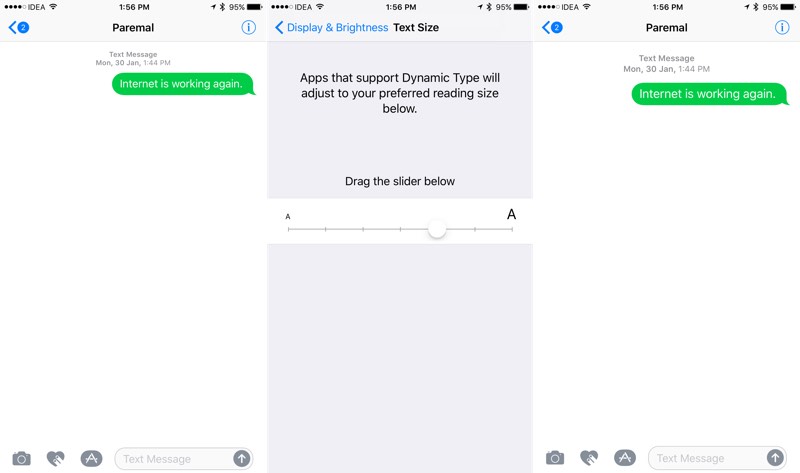
The first thing you should do is go into the settings and increase the text size. This will update the text size OS-wide and for any app that uses iOS’s dynamic type. A lot of apps like Facebook Messenger, Twitter and more do.
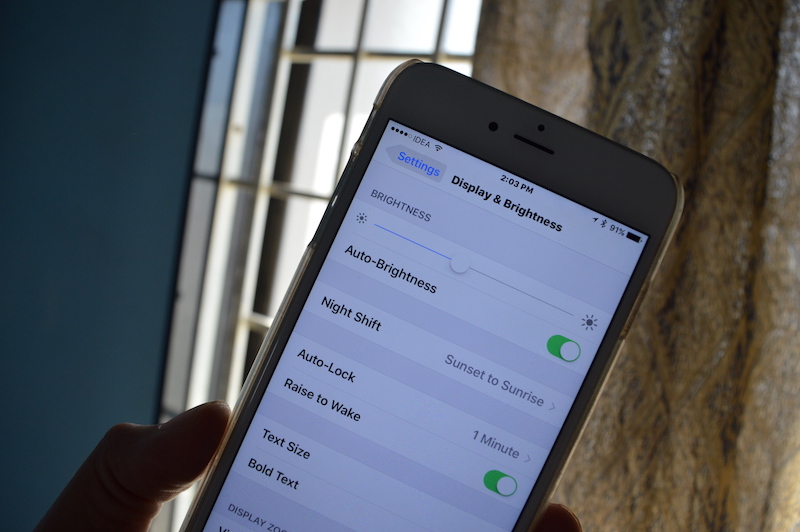
Go to Settings -> Display and Brightness -> Text Size.
Drag the slider to the right to increase the font size. You’ll be able to see the increase in the preview above the slider.
2. Display Zoom

Display Zoom is a clever feature that works for iPhone 6/7 and iPhone 6 Plus/7 Plus sizes. Once enabled, iOS will simulate the 5s display screen on the iPhone 6 size. And iPhone 6 size on the iPhone 6 Plus display. So on the same screen, you’ll see a lot less, but everything will be much bigger. You’ll see less icons on the screen, less text bubbles and UI elements in apps and so on.
If increasing the text size doesn’t help (because it doesn’t apply to UI elements), turning on Display Zoom surely will.
Go to Settings -> Display and Brightness -> Display Zoom to turn it on.
3. Make Text Bold

The new San Francisco font can sometimes be too thin to read, especially on the Home screen. Go to Settings -> Display and Brightness and turn on the Bold setting. The setting will toggle OS-wide as well. So you’ll be able to read messages easily.
4. Zoom into Specific Parts

iOS has a virtual magnifying glass mode in the accessibility settings. It lets you zoom into a particular part of the screen. Once activated, you get a rectangular floating window over the screen, that you can swipe around on the screen to make things bigger.
Go to Settings -> General -> Accessibility -> Zoom to toggle it on.
Now, double tap with three fingers on the screen to engage the zoom mode. Double tap with three fingers, then drag up and down to zoom in and out.
To get to the window zoom option we talked about above, make sure Zoom Region says Window Zoom. When you do the three finger double tap now, you’ll get a floating resizable rectangular window that acts as a virtual magnifying glass. Use the handle below to drag it around. Tap on the hand to view options.
5. Turn Buttons into Buttons

Ever since iOS 7, Apple has virtually said goodbye to buttons. While iOS 10 does add some of that back, labels in toolbars are still just text, not buttons.
It can sometimes be hard to tell what’s a button and what’s just a label. Go into Settings -> General -> Accessibility and turn on Button Shapes. Now, all tappable buttons on the UI will have a grey background to signify that they’re buttons.
6. Use Night Shift

Night Shift is a feature in iOS that adds a warm yellow tint on the screen. The theory is that looking at bright blue light before going to bed can negatively affect your sleep. If you have eye problems, looking at a warmer, yellowish screen can be soothing.
Go into Settings -> Display and Brightness -> Night Shift, turn on the feature and put in on an automatic schedule of sunset to sunrise. Or your own schedule.

You can manually enable this mode during daytime as well from the Control Center.
7. Use True Tone on iPad
The 9.7 inch iPad Pro comes with a True Tone display. The iPad has color temperature sensors built in and it adjusts the display based on the environment you’re in. So if you’re in a place with warm yellow light, the display will automatically turn a bit warmer too. So you’re not looking at bright blue light, harming your eyes.
The effect is subtle but really useful (it was one of my favorite things Apple released in 2016).
If you’re not already using it, go to Settings -> Display and Brightness and turn on True Tone.
Which Accessibility Setting Makes the iPhone More Usable for You?
iPhone and iPad are class leaders when it comes to accessibility. Whether it’s the superior voice control options or something as simple as turning the phone’s camera into a magnifying glass.
What are some of the accessibility features that makes iPhone usable for you? Share with us in the comments below.