One of the most well thought-out features of the iPhone is Do Not Disturb, a comprehensive profile setting that lets you quickly turn off your phone’s ringtones and alerts, and also route calls through to your voicemail, when you need to step into a meeting or go to bed. Here’s how you can customize your Do Not Disturb settings and be discreet at a moment’s notice.
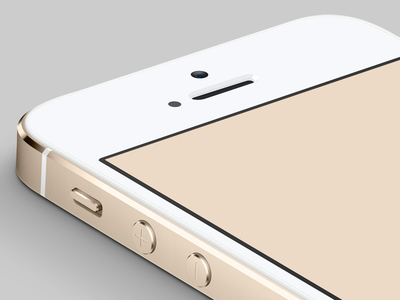
Note: Do Not Disturb differs from Mute. You can mute your device by using the Mute switch, located on the left side of your iPhone, above the volume buttons. You can turn it on at any time, and this affects volume settings across apps, including your ringtones, app alerts and game audio — but not your alarms. Also, Mute doesn’t silence music apps, though, so if you’re trying to be quiet, don’t fire up your media player and fiddle with the play button.
Do Not Disturb silences your ringtones and alerts from email, messaging and other apps, and your iPhone will not ring, vibrate or wake up the display to show you notifications. You can check these by unlocking your iPhone. When Do Not Disturb is on, you’ll see a crescent moon icon near the battery meter display at the top of your screen.

The Mute switch is located above the volume buttons (image by Ryan Ford)
There are three ways to turn on Do Not Disturb mode:
Control Center
You can also toggle Do Not Disturb in Control Center, by swiping up from the bottom of your screen at any time, and then tapping the crescent moon icon.

Swipe up to open Control Center and toggle Do Not Disturb mode
Settings menu
Launch Settings > Do Not Disturb and switch on Manual. The crescent moon icon at the top of your screen indicates that Do Not Disturb mode is on.

Manually turn on Do Not Disturb in the Settings menu
Schedule Do Not Disturb for a certain time in the day
If you’d like to have your iPhone remain silent during a certain time in the day, you can schedule Quiet Hours to have Do Not Disturb automatically turn on and off at specific times — for example, when you go to bed at 11pm and until you wake up at 7am.
- Launch Settings from your home screen, and tap Do Not Disturb.

Find Do Not Disturb in the Settings menu
- Enable Scheduled. You’ll now see From and To times below this option. Tap the arrow alongside these times to change them.

Adjust Do Not Disturb settings to suit your usage habits
- Adjust the From time to schedule when you want Do Not Disturb to automatically turn on, and the To time for when you want it to turn off. Tap Back when you’re finished.
Your iPhone will now toggle Do Not Disturb mode by itself. Keep in mind that these Quiet Hours always override manual Do Not Disturb settings.
Be alerted of calls from your favorite contacts
While you may not want to be disturbed by messages and alerts, you might want to still be available to certain contacts, like family and close friends. For this, you’ll first need to add those contacts to your Favorites.
- Launch Phone from the home screen and tap Contacts.
- Search for a contact you’d like to add to your Favourites list, and tap his/her name to view the contact’s details.
- Scroll down through the contact’s details, and tap Add to Favorites.

Tap Add to Favorites to add a contact to the Favorites list
- Repeat as necessary for all the contacts you want to add to your Favorites list.
Now let’s allow calls only from Favorites while Do Not Disturb is enabled.
- Tap Settings and then tap Do Not Disturb.
- Tap Allow Calls From, and then select Favorites in the options on the next screen.
You can also choose to allow calls from everyone or no one on this screen. - Tap Back to confirm your selection.
Now, in case you choose to only allow calls from your favorite contacts, but want to hear from other callers who are urgently trying to get in touch with you, you can allow the second call from the same caller within three minutes through.
- Tap Settings and then tap Do Not Disturb.
- Tap Repeated Calls to allow the second call from the same contact within three minutes.
Lastly, you can choose to have your iPhone silenced only when it’s locked, or all the time — even when you’re using it.
- Tap Settings and then tap Do Not Disturb.
- Scroll down to the Silence section, and tap Always to have your iPhone silent at all times in Do Not Disturb mode, even when it’s in use.

Set your iPhone to silent only when locked or all the time
- Alternatively, tap Only when iPhone is locked to silence your phone in Do Not Disturb mode only when your iPhone is not in use and is locked.
That’s a wrap! With these tips, you should be able to stay as discreet as you like with your iPhone. Let us know your tips for keeping your device quiet in the comments below.