
Want to know how to screen record on iPhone? Since the iOS 11 update, you can record and share your screen’s content as a video without using a 3rd-party app.
That’s especially helpful when creating instructional videos, gameplay streams, or app demos.
Apple makes it a cinch to record your iPhone or iPad screen. This article will show you how to do it step-by-step.
What is Screen Recording?
Screen recording is a handy feature in Apple devices running iOS 11 and up. It lets you record what happens on your iPhone, iPod touch, or iPad screen.
You can record everything, including app and system interfaces. We’re talking mouse clicks, scrolling, and anything visible on the display.
To access the feature, open the control center then tap the gray record button. The screen recording tool will start after the three-second countdown. You can record audio, video, or both.
To stop recording, simply tap the stop button (red circle). The recordings will be automatically saved to the Photos app’s photo library.
Importance of Screen Recording
You can do more than take screenshots with screen recording. It offers the following use cases and benefits:
Enhancing Learning and Training
The feature can be a lifesaver when creating instructional materials. The visual punch of video tutorials, lessons, and demos is helpful to trainers and educators. That’s why it is important to know how to record the screen on your iPhone.
Creating Tutorials and How-To Guides
It’s the perfect tool to create how-to guides and step-by-step tutorials. Hit the record button to demo how to use an app, perform a task, or complete a process. It’s also easy to add voiceover commentary to your content.
Capturing Online Meetings and Webinars
We’re in the era of remote and hybrid work. The feature helps you document online meetings, presentations, webinars and other virtual events.
It allows you to save and review meetings. You can share the video content for those who missed the live session or for future reference.
Documenting Software Bugs and Issues
The feature helps you show problems with an app or device’s systems. You can document bugs, glitches, or unexpected software behavior.
With it, you can demo and share issues with developers to troubleshoot. That makes it incredibly helpful for bug reports and improving software quality.
Supporting Customer Service and Technical Support
Support teams need to understand user problems in context. The iPhone screen recorder can trace user actions and issues the customers face. Support technicians can then diagnose and resolve customer problems quickly.
The same goes for customer service. The reps can easily guide users through solutions over the phone or chat.
How to Screen Record on iPhone: Prerequisites
You must ensure the following two things before using the screen-recording tool:
Ensure Your iPhone is Updated
The feature requires iOS 11 and up to work. You can check for the latest updates in Settings > General > Software Update.
Check Available Storage Space
Screen recordings can gobble up storage space, especially long, high-res videos. Ensure you have at least 2-3GB of free space before your iPhone record screen.
You can check storage in Settings > General > iPhone Storage. Some older devices may lack enough storage for 720p videos longer than 25 minutes.
How to Enable Screen Recording on iPhone
Once you’re OK with your device software and storage, follow these steps to enable the feature:
Step 1: Access Control Center
Swipe down from the top right corner of your iPhone’s display to open the Settings.
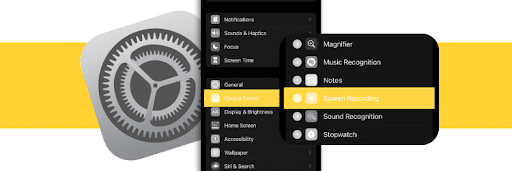
Step 2: Add Screen Recording to Control Center
Go to Control Center > Customize Controls. Then, find and tap the “+” icon next to Screen Recording.
The feature is now enabled and a tap away from the controls.
How to Start Screen Recording
With the feature enabled, follow these easy steps to start screen record on your iPhone:
Step 1: Open Control Center
On your iPad, iPhone, or iPod touch, swipe down from the top right of the screen. Then, open the Control Center.
Step 2: Tap the Screen Recording Button

Locate and tap the gray circular screen record button. This will start a three-second countdown. Now, you can prep your device.
Enable Do Not Disturb mode to prevent interruptions. Position your iPhone if using it to record an external area through the front camera.
Exit the Control Center to start to record your screen. EVERYTHING happening and visible on your screen will be recorded.
You can tap the Stop button at any time to stop to record your screen.
Using Screen Recording Features

Here are some useful features available when you record your screen:
Recording Audio with Screen Recording
By default, it captures only your device’s screen inputs, such as touch gestures. You can also record audio (e.g., using the microphone during a call).
To add sound, long-press the Screen Recording icon and toggle the Microphone button before starting.
Pausing and Stopping the Screen Recording Feature
To pause, tap the red bar at the top of the display. Tap it again to resume.
When finished, tap the red Stop record button. Recordings will be automatically saved to your photo library. In some iPhones, you can swipe up from the bottom for quick access to stop.
Taking advantage of audio recording and pause/stop functionality provides greater control.
How to Screen Record on iPhone: Editing and Sharing
Once done, you can scroll down and review your Screen Recordings. Here’s how to edit and share your final footage.
Editing Your Screen Recording
Open the Photos app and locate your new recording under the “Screen Recordings” album. Tap into it and use the built-in trim/edit tools to adjust the start and end points. You can also trim directly in iMovie on any iPad or iPhones.
Sharing Your Screen Recording
After editing, tap the share button and send your recording via Messages, Mail, YouTube, social media, or other apps. You can also export it as a video file.
Troubleshooting Common Issues
This feature can sometimes run into issues that need troubleshooting:
Screen Recording Not Working
Common fixes include restarting your iPhone and updating to the latest iOS. Check available storage space and ensure Screen Recording is enabled.
Screen Recording Without Sound
Sound is not added to videos by default. Toggle the Microphone button to enable sound.
Audio-recording for calls requires developer support. Check app info. For system/games, restart your device and try again with the microphone enabled.
How to Screen Record on iPhone: Tips and Tricks
With a few tricks, you can record your screen like a pro:
Use Do Not Disturb Mode
When recording, enable Do Not Disturb. It helps block notifications/alerts from interrupting.
Optimize Settings for Clearer Recording
Under Settings > Camera, check that the Record Video option is set to the most current quality standard (e.g., 4K). Adjust brightness and optimize for clear capture.
How to Screen Record on iPhone FAQs
Find answers to questions you may have about How to Screen Record on iPhone:
Can I Screen Record on an iPhone Without the Control Center?
There’s currently no built-in way to screen record on the home screen on your iPhone without using the Control Center. Swipe up from the bottom of the screen to access the Control Center and tap the start recording button.
However, some third-party apps don’t need the Control Center to record your screen. Apps like iRec and Shooter let you start and stop recording from their interfaces.
Does Screen Recording Capture Phone Calls and Facetime Audio?
The built-in screen recording iPhone feature won’t capture audio from phone calls, FaceTime calls, or FaceTime Audio calls. The microphone is disabled for your privacy. It only records audio coming from within apps or the device speaker.
If you want to record a conversation, use a third-party audio recorder app and record the call sound separately. Later, you can sync the audio and video files in an editing app.
How Can I Edit My Screen Recordings on an iPhone?
Find your iPhone screen recordings on the Photos app, then tap Edit. On the device, you can apply video filters, rotate, crop, or trim.
Why Is My Screen Recording Not Saving to the Photos App?
Your device storage is likely full. Check your iPhone’s available space if it is enough to save the screen recording to the Photos app. Delete unwanted videos and other files to create more space.
Restart your iPhone to resolve any Control Center and third-party issues. If they persist, contact Apple support for troubleshooting assistance.
Can I Record Gameplay and Stream It Live From My iPhone?
Yes, you can record and even live stream your iPhone gameplay using several apps available. The built-in screen recording won’t allow live streaming
However, third-party apps like Streamlabs, Duel, IGaming Box, and XSplit Gamecaster can help. They let you broadcast gameplay from your iPhone to Twitch, YouTube, or Facebook Live.
How to Screen Record on iPhone Final Verdict
Screen recording is a powerful tool for capturing content from your iPhone screen. You can record tutorial videos and gameplay sessions or save what’s happening on your screen.
The feature allows you to capture high-quality video without any extra hardware or app. Follow the simple steps we’ve outlined to start screen recording with a few taps.
Recording your iPhone lets you preserve and share moments from your mobile device. Have fun creating videos, and remember that it has many practical and creative uses.