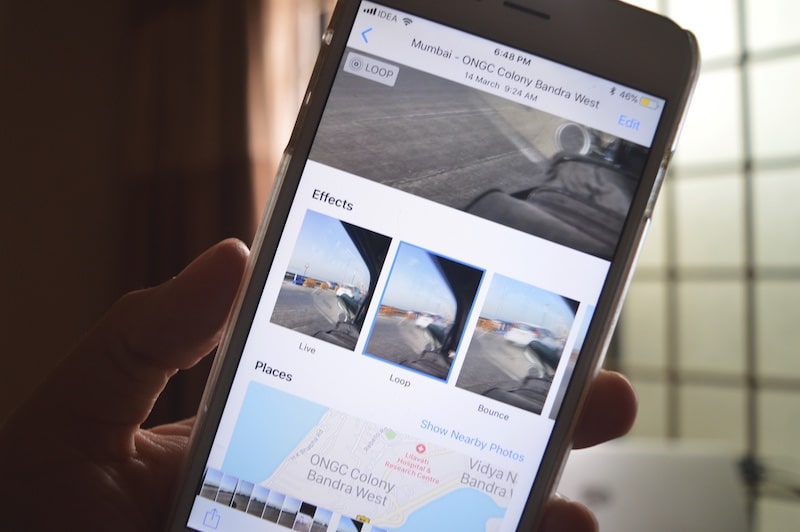
iOS 11 gives Live Photos a thorough update. Not only can you edit them, you can also add some really cool effects. If like me, you’ve been a fan of Live Photos for the past two years, now is the time to go back through all your favorite Live Photos and make them even better.
When enabled, Live Photos take a short, 1.5 seconds video before and after you hit that shutter button. So you end up with a short animated clip along with a high quality still. The end result is similar to the moving newspaper images in Harry Potter. Now, use Live Photos effects, you can make your animated clips even better. You can loop them, give it a boomerang-like effect, or turn it into a really cool Long Exposure shot. Here’s how it works.
How to Use Live Photos Effects
Step 1: Open the Photos app and find a Live Photo. It will have a “Live” icon in the corner.
Step 2: When the photo is selected and it’s in full-screen mode, just swipe up anywhere on the photo.

Step 3: This will reveal contextual options for the image. You’ll find a new section called Effects. There are three effects – Loop, Bounce, Long Exposure. Tap on an effect to see a preview.

The Effects
A. Loop: Loop just turns the animated Live Photo into an endless animation. If you’re looking for a GIF-like effect, where the animation keeps repeating, choose the Loop effect.
B. Bounce: This is similar to Instagram’s Boomerang effect. It will reverse the animation once it’s done. So it’s the same video, but it plays backward at the end.

C. Long Exposure: This is a really cool effect that will only work on a subset of photos – where most objects in the photo are unmoving. This effect freezes the unmoving parts and blurs the moving parts. So what you end up with is a really cool effect of blurred motion. If you have photos of the waves at the beach or moving traffic, just try this effect. Unlike the first two effects, this effect changes the still images instead of the animation.
https://twitter.com/Happygallo/status/881655996472590336
Live Photos Effects: Tidbits
- When you use an effect like Loop or Bounce, it switches the image to the video. You won’t be able to get to the original still image until you revert back to the Live effect. So if you want to change the effect, we recommend that you first duplicate the photo (by going into the Share sheet and selecting Duplicate).
- When shared, the Loop and Bounce effects are exported as video files (.mov). For Loop, the resulting video doesn’t actually keep looping like a GIF.
- The sharing options for Live Photo Effects are lacking. After all, most of us add effects so we can post them on social networks like Instagram and Facebook.
Try Trimming Live Photos

If you can’t nail an awesome Loop or Bounce effect, first try trimming the Live Photo. Tap on Edit and use the yellow buttons in the ticker below to make the clip shorter. Once the unnecessary parts are removed, try creating the effect again.
What do you think of the new iOS 11 features for Live Photos? Do you use them often? Have they surprised and delighted you at times? Share with us in the comments below.